 Reference
P3 Finder(Phase based 3D RAIN RFID tags Finder SDK) Development Guide
This document describes the development steps to start your development using P3 Finder SDK for ios.
Table of Contents
- Minimum System and Programming Requirements
- Get started
- Use P3 Finder SDK API in your project
- Convenient UIs
- Authentication
Minimum System and Programming Requirements
- iOS 10.0+
- macOS 10.11+
- Xcode 8.0+
- Swift programming
- Apple Developer License
- An iOS device
- ASR-R250G
Get Started
(1)Download SDK and License File from https://p3sdk.rflocus.com/. Note that a license file is needed per PS3SDK project.
Contact p3finder@rflocus.com for inquiry and getting access to the SDK.
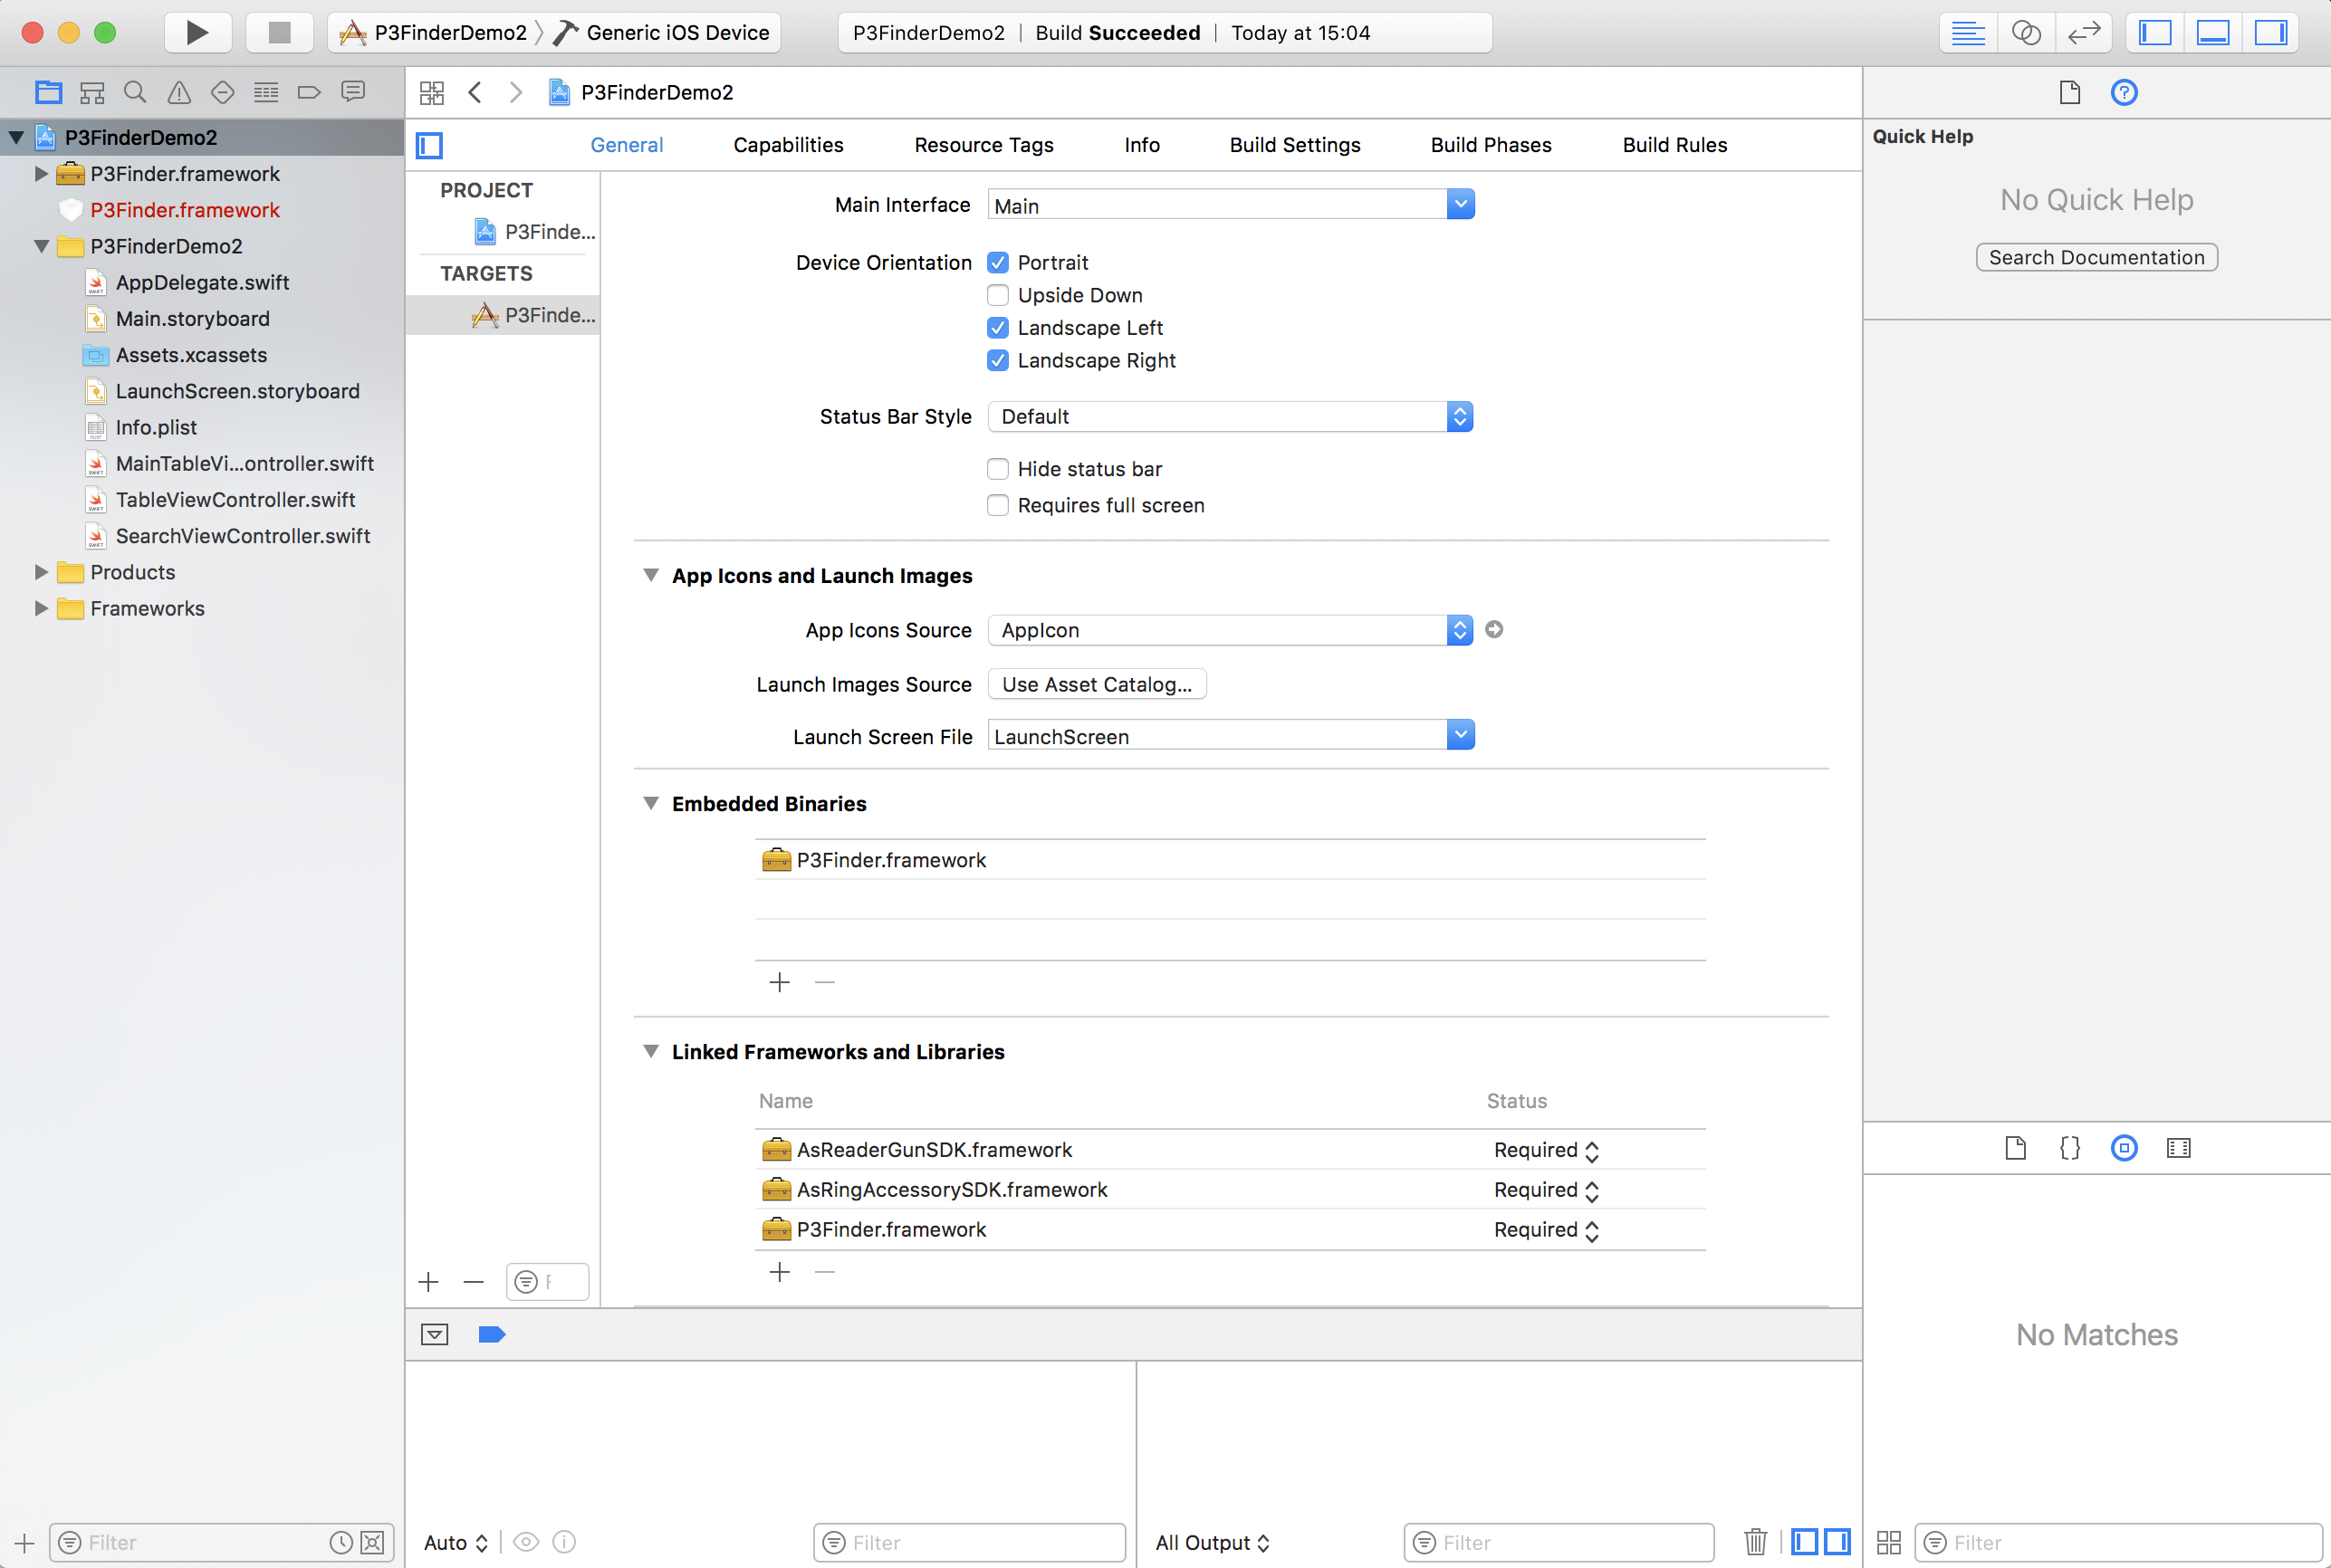
(2)Import the downloaded frameworks listed below into a Xcode Swift Project
- P3Finder.framework
- AsReaderGunSDK.framework
- AsRingAccessorySDK.framework
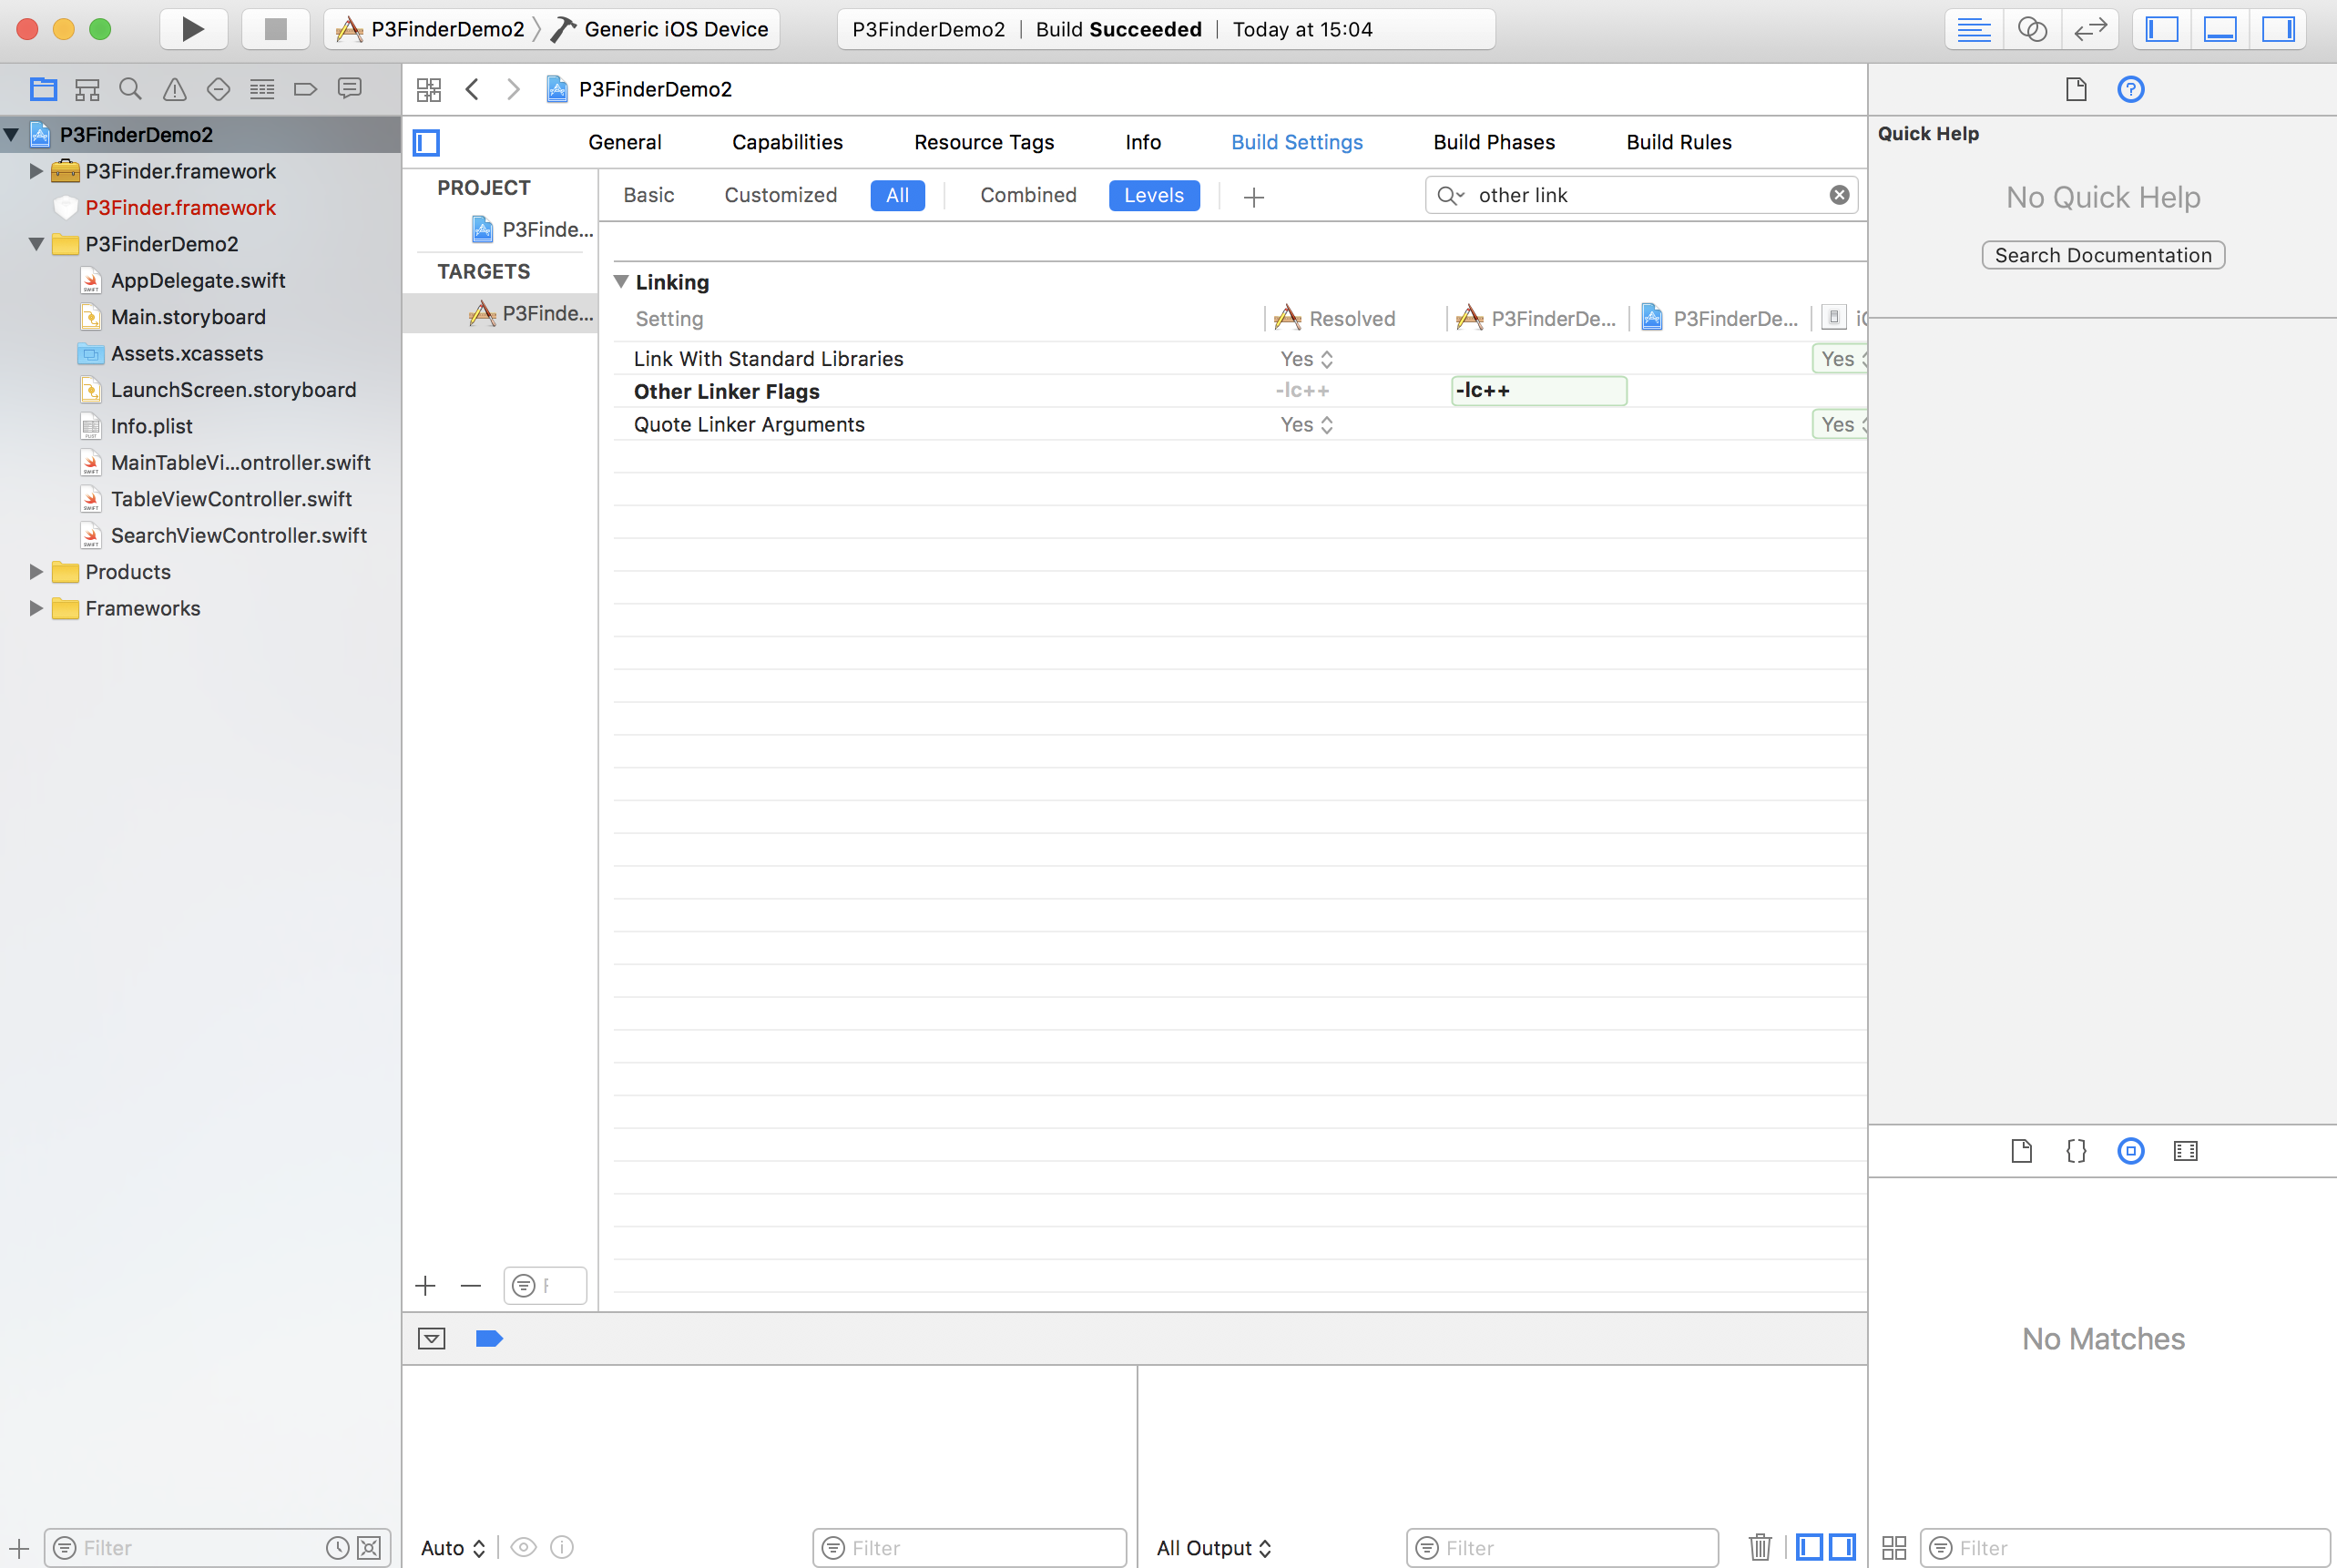
(3)Configure Build Settings Add the following flags to the ‘Other Linker Flags’ setting:
-lc++
(4)Select your application info.plist and open it as source code. Add the following code into file:
    <key>UISupportedExternalAccessoryProtocols</key>
    <array>
        <string>jp.co.asx.asring.plus</string>
        <string>jp.co.asx.asreader.rfid</string>
        <string>jp.co.asx.asreader.6dongle.rfid</string>
    </array>

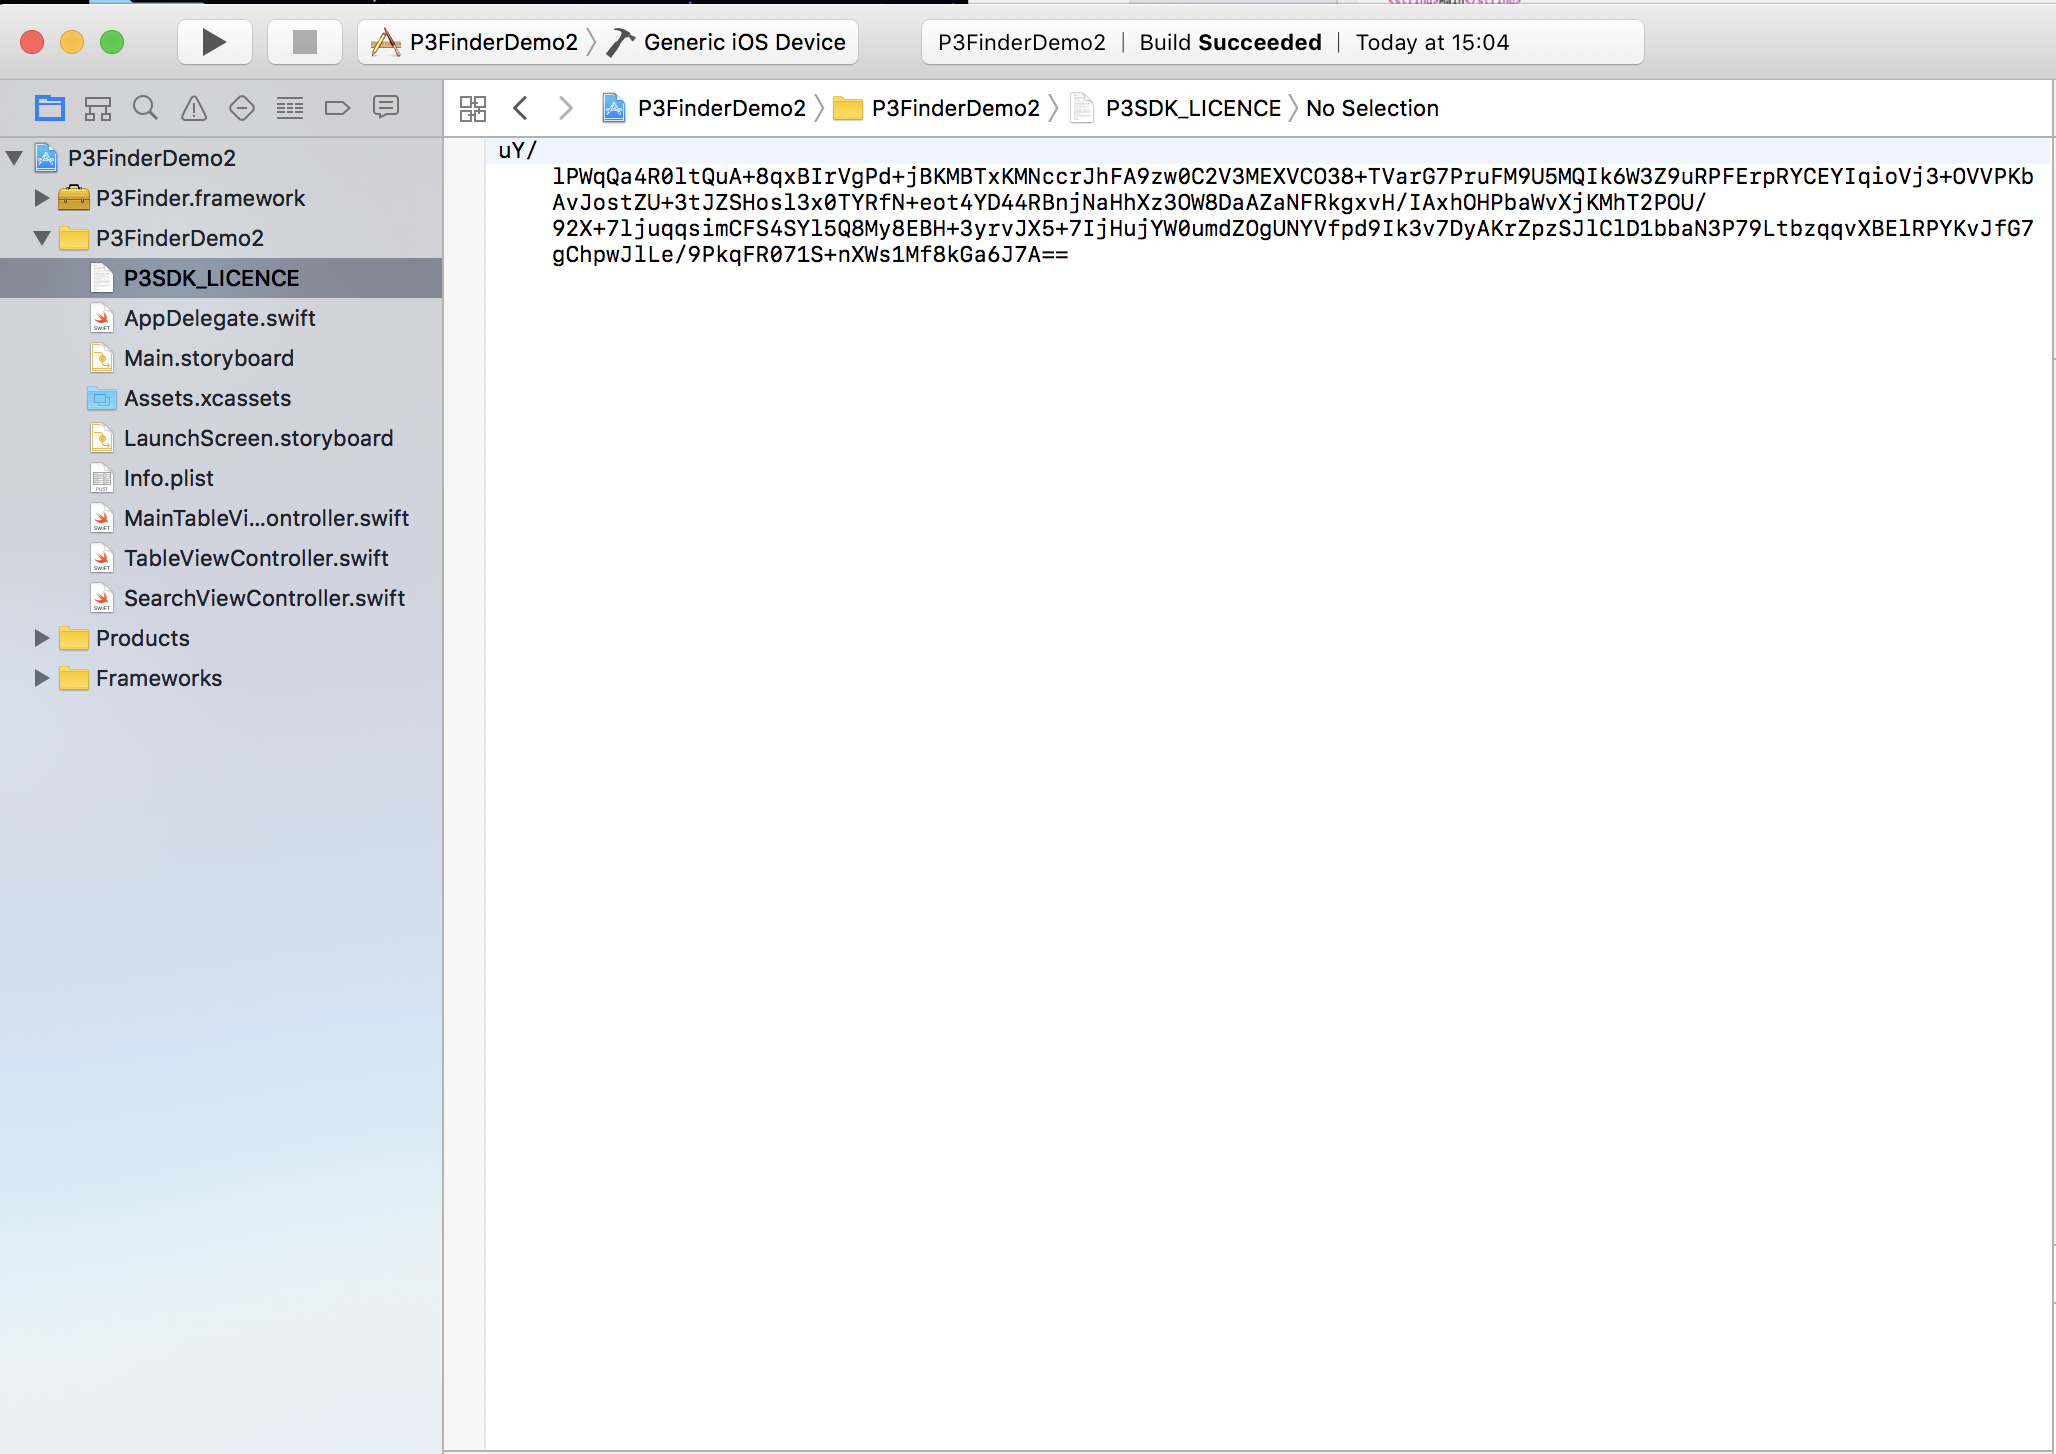
(5)Place the downloaded license file P3SDK_LICENCE in the project folder.
Use P3 Finder SDK API in your project
There are two methods to a P3Finder search view using P3 Finder SDK API.
Note on building your project: Attach your iPhone device and build your project against the device. Emulator options are not to be used.
Method 1 - Create a standard search view.
You can get a search-tag view controller just by adding a button (for an example) with the following code:
import P3Finder

    @IBAction func doSearch(_ sender: Any) {
        let sd = UIStoryboard(name: "P3Finder", bundle: Bundle(for:P3SDK.self))
        let vc = sd.instantiateViewController(withIdentifier: P3SDK.SearchVC_ID)
        self.navigationController?.pushViewController(vc, animated: true)
    }
Upon clicking the button, the view controller will render the P3Finder’s search-tag display.
Tip: Refer to the sample project, P3Finder Demo, for building a Navigation controller view to render a UIView that renders the search tag display.
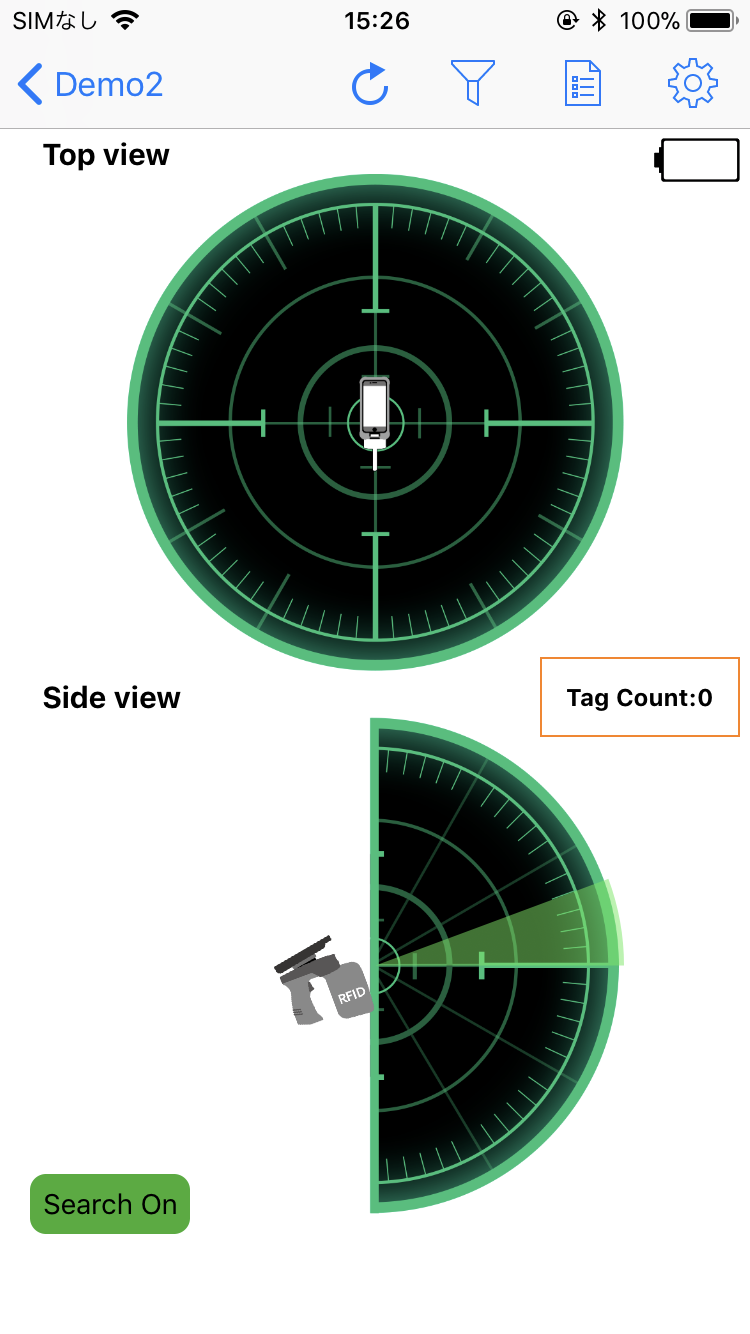
The search-tag display provides the following functions:
- To locate RAIN tags in a search and show their locations relative to the position of reader in real time.
- To filter RAIN tags in a search.
- To display list of RAIN tags found in real time.
- To establish connectivity with a mobile RFID reader.
- To configure RFID reader parameters such as Power,Frequency etc. (Please refer to Section Settings for details).
To locate a specific tag in tag search and display it on Search-tag display, simply specify the tag value to P3SDK.setTargetEpc method as shown in the following code example.
  let sd = UIStoryboard(name: "P3Finder", bundle: Bundle(for:TagFinder.self))
  let vc = sd.instantiateViewController(withIdentifier: P3SDK.SearchVC_ID)
  P3SDK.setTargetEpc(epc, searchVC: vc)
  self.navigationController?.pushViewController(vc, animated: true)
Additionally, you can also create your asReader GUN instance and pass it to P3 Finder SDK by P3SDK.asReader property as shown below.
  let sd = UIStoryboard(name: "P3Finder", bundle: Bundle(for:TagFinder.self))
  let vc = sd.instantiateViewController(withIdentifier: P3SDK.SearchVC_ID)
  P3SDK.asReader = MyAsReader
  P3SDK.setTargetEpc(epc, searchVC: vc)
  self.navigationController?.pushViewController(vc, animated: true)
Method 2 - Create an enhanced search view via API classes of TagFinder and RadarView
- TagFinder : Handling tags from AsReader and compute locations of tags
- RadarView: A GUI for showing locations of tags
(1) Create a global instance of TagFinder
let g_tagFinder = TagFinder.shareInstance
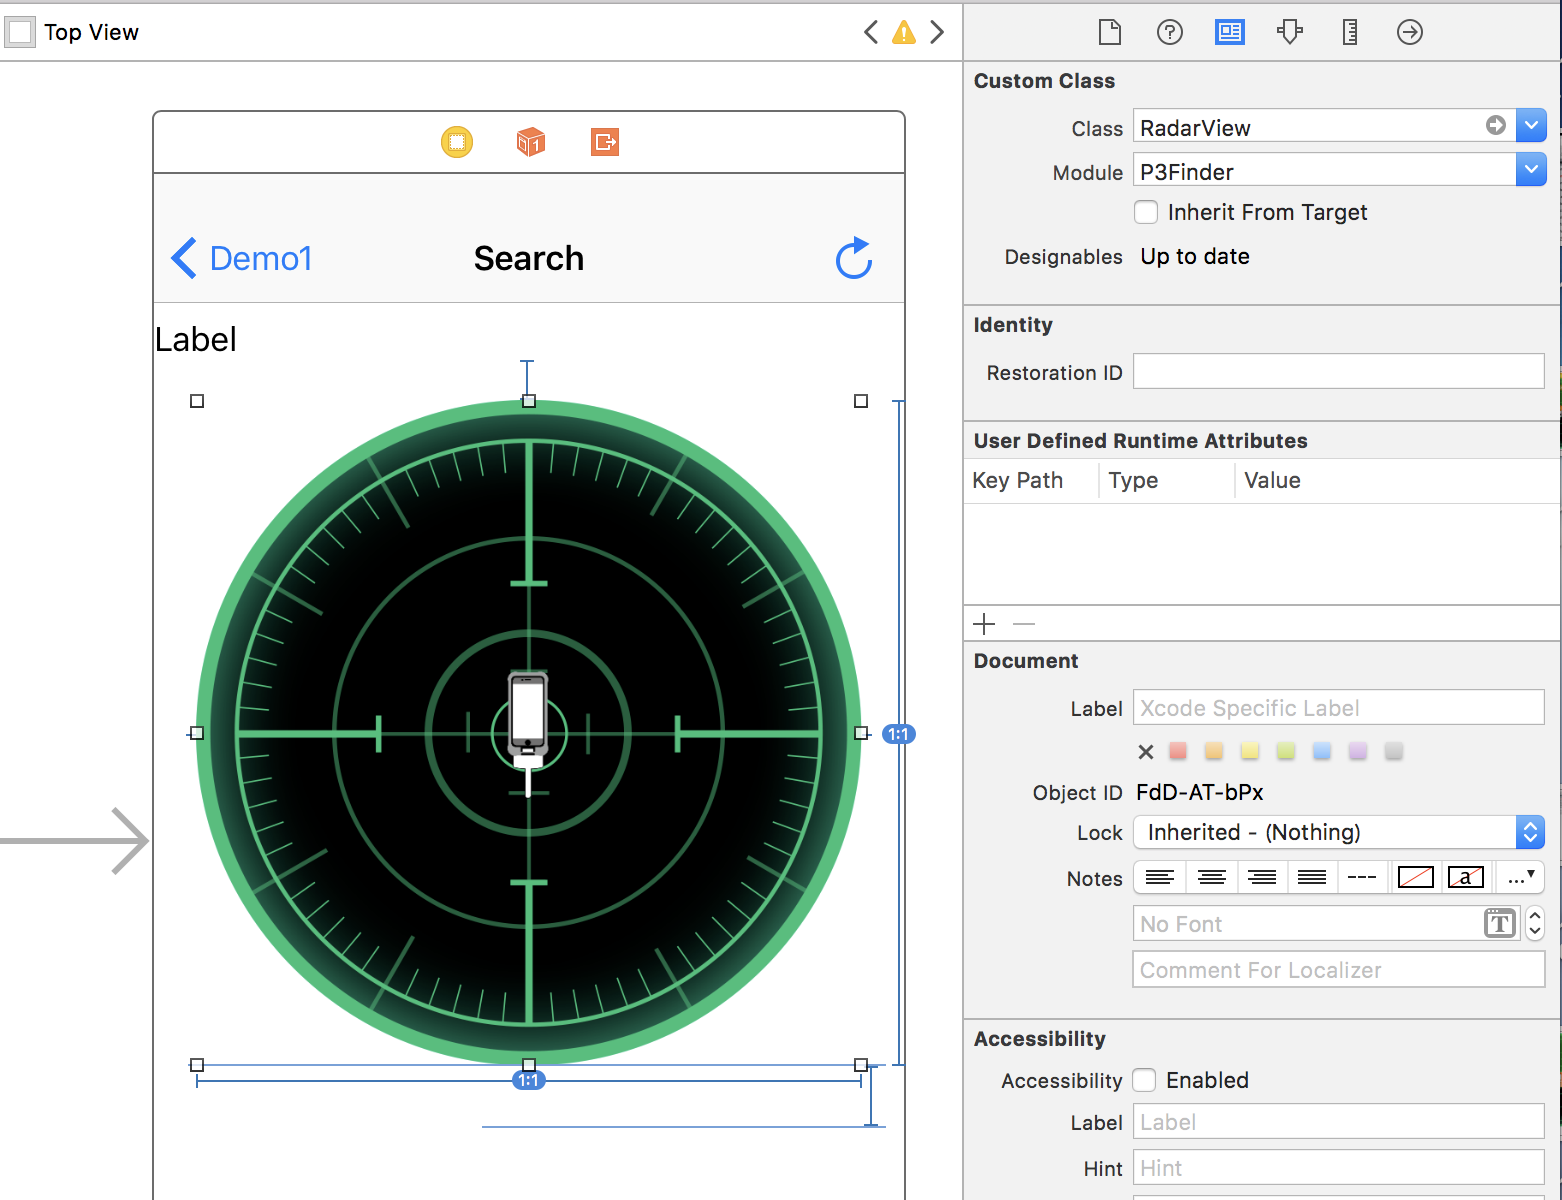
(2)Drag a UIView into your storyboard scene and set the custom class of UIView to RadarView in the identity inspector.
(3) Create your view controller that implements TagFinderDelegate.
class SearchViewController: UIViewController,TagFinderDelegate
(4) Connect the RadarView to your view controller code.
@IBOutlet weak var topView: RadarView!
(5) Initialize an instance of TagFinder , set delegate and add RadarView to it.
let tagFinder:TagFinder? = TagFinder.shareInstance

override func viewDidLoad() {
        super.viewDidLoad()

        // Do any additional setup after loading the view.
        tagFinder?.delegate = self
        tagFinder?.clear()
        tagFinder?.addView(topView)
     if reader != nil{
            DispatchQueue.main.async {
                P3SDK.asReader = self.reader!
                self.tagFinder?.setEpcTarget(self.target)
            }
        }
 }
If there is an instance of AsReader Gun object, your can pass it to TagFinder. Otherwise, TagFinder will create an instance of AsReader Gun and manage the connection.
(6) Add the following code to make sure TagFinder shows locations of tags on RadarView automatically.
  override func viewWillAppear(_ animated: Bool) {
       tagFinder?.startUpate()
  }

   override func viewWillDisappear(_ animated: Bool) {
       tagFinder?.stopUpdate()
   }
(7) Add the following code to start/stop an inventory operation.
@IBAction func doRfid(_ sender: Any) {
       if self.btnRfid.titleLabel?.text == "Search On"{
           tagFinder?.reader.startInventory()
       }else if self.btnRfid.titleLabel?.text == "Search Off"{
           tagFinder?.reader.stopInventory()
       }
   }
You also can start/stop an inventory operation by pressing on/off the trigger of AsReader GUN.
(8) Implement the callbacks of TagFinderDelegate
func statusChanged(_ status: TagStatus) {
    //do something according to the status:Separaing,NoRead,Over,Far,Close,Near,Immediate
}
func reportReaderStatus(_ status: ReaderStatus, result: Bool) {
    //do something according to the readerStatus :connect,disconnect,startInventory,stopInventory

}
func reportTag(_ tag: TagData) {
    //do something when receiving tags
}
(9) If you created your asReader GUN instance and passed it to P3SDK, you need to pass it again to P3SDK when AsReader is reconnected.
func AsReaderGUNConnected(notification:Notification){
    DispatchQueue.main.async {
        g_reader = AsReader(asReaderGUN: self.mAsReaderGUN, delegate: self)
        if P3SDK_called_flag{//you need to set a flag to indicate if P3SDK is being called.
            P3SDK.asReader = g_reader!
        }
    }

}
Tip: Refer to the sample project, P3FinderDemo2, for references.
Convenient UIs
RadarView
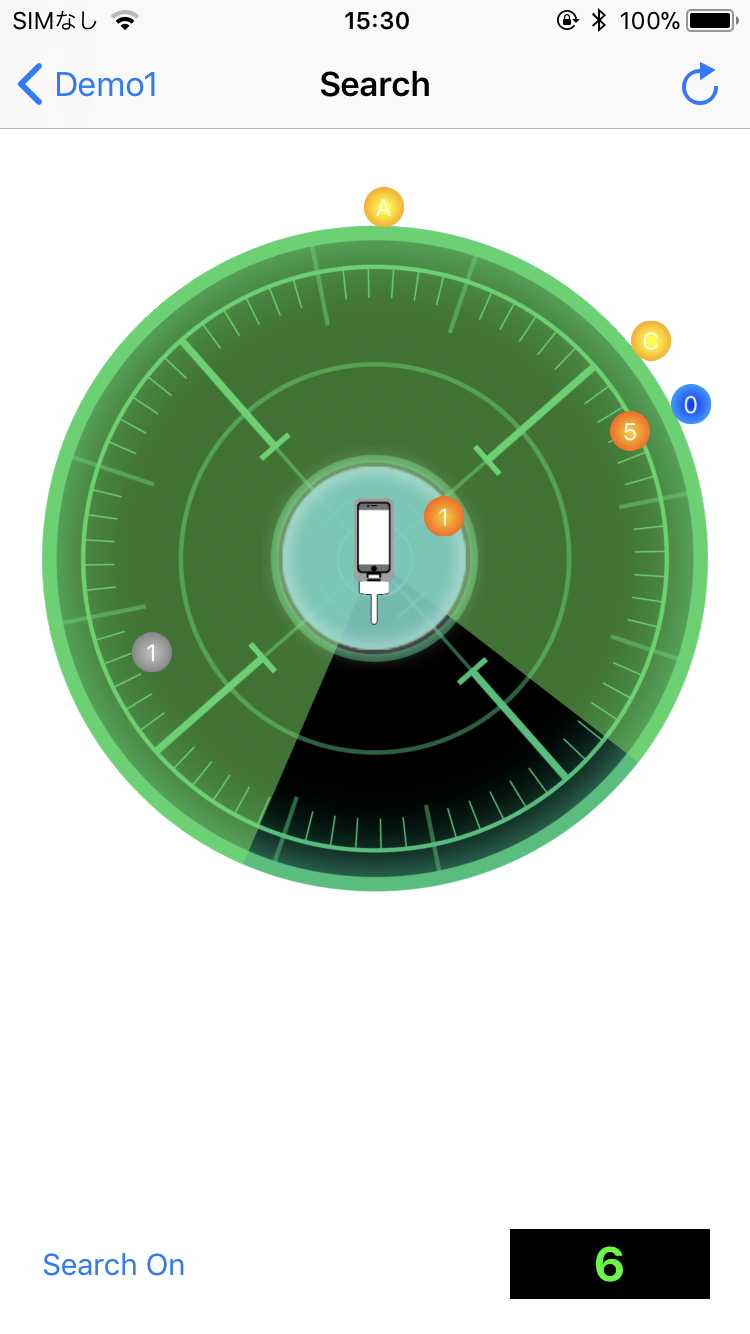
Orange mark: Tags are being read and their positions are determined.
Yellow mark: Tags are approaching and their positions aren’t determined.
Blue mark:Tags are separating and their positions aren’t determined.
Gray mark: Tags aren’t being read or reader is moving over after tags’ positions are determined.
Blur circle in center: It will appear when the reader is close to the tag.
Text in mark: The last letter of tag’s EPC code.
Rssi-range
Real-time positions of RAIN tags relative to your RFID reader are computed based on RSSI values collected and these positions are shown on RadarView. Note that the center of maps denote the position of your RFID reader.
To improve the accuracy of computation on RSSI in dynamic environments, there are 3 configurable paramaters: Far, Near and Close, and they are called rssi-range values.
P3 Finder SDK offers a UIView controller, RssiRangeViewController, to help set the rssi-range values. Use the following to invoke the view controller.
  let sd = UIStoryboard(name: "P3Finder", bundle: Bundle(for:P3SDK.self))
  let vc = sd.instantiateViewController(withIdentifier: P3SDK.RssiRangeVC_ID)
  self.navigationController?.pushViewController(vc, animated: true)
Alternatively, RSSI range values are accessible from the Settings view.
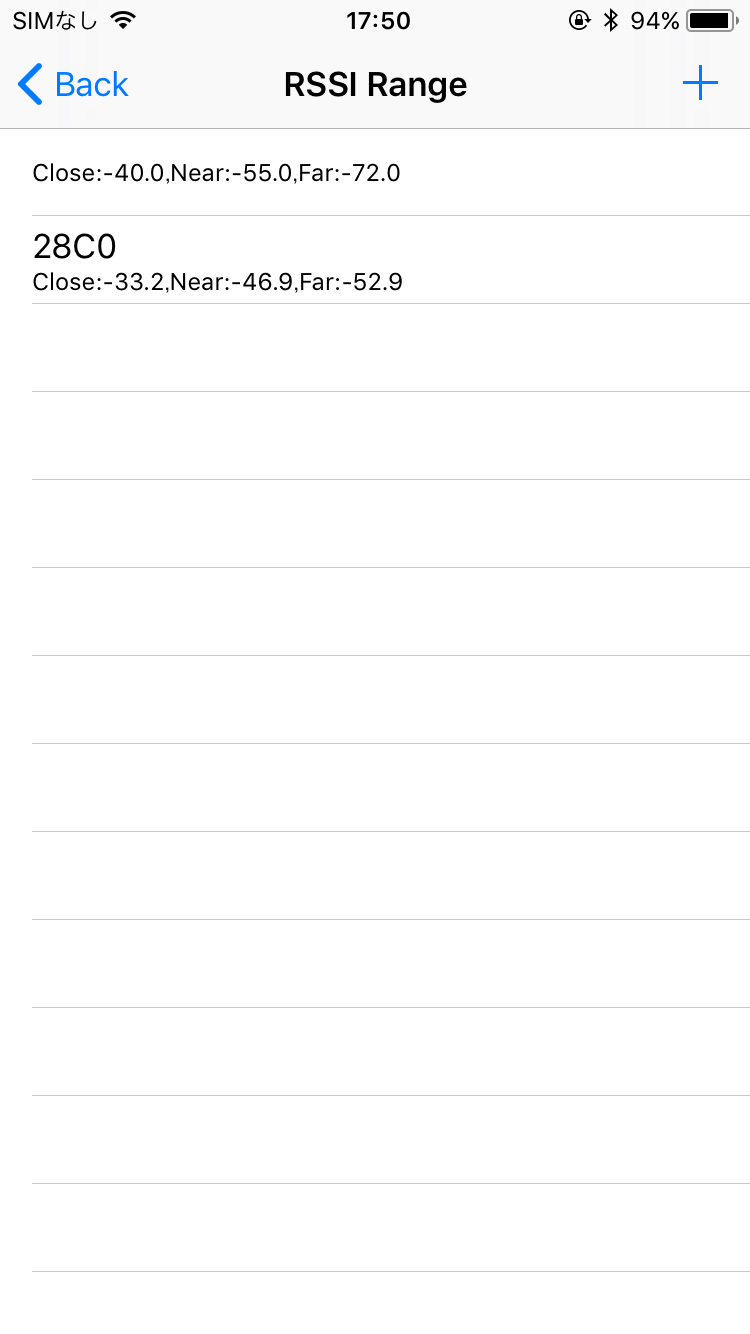
These RSSI range values may be adjusted as shown below.
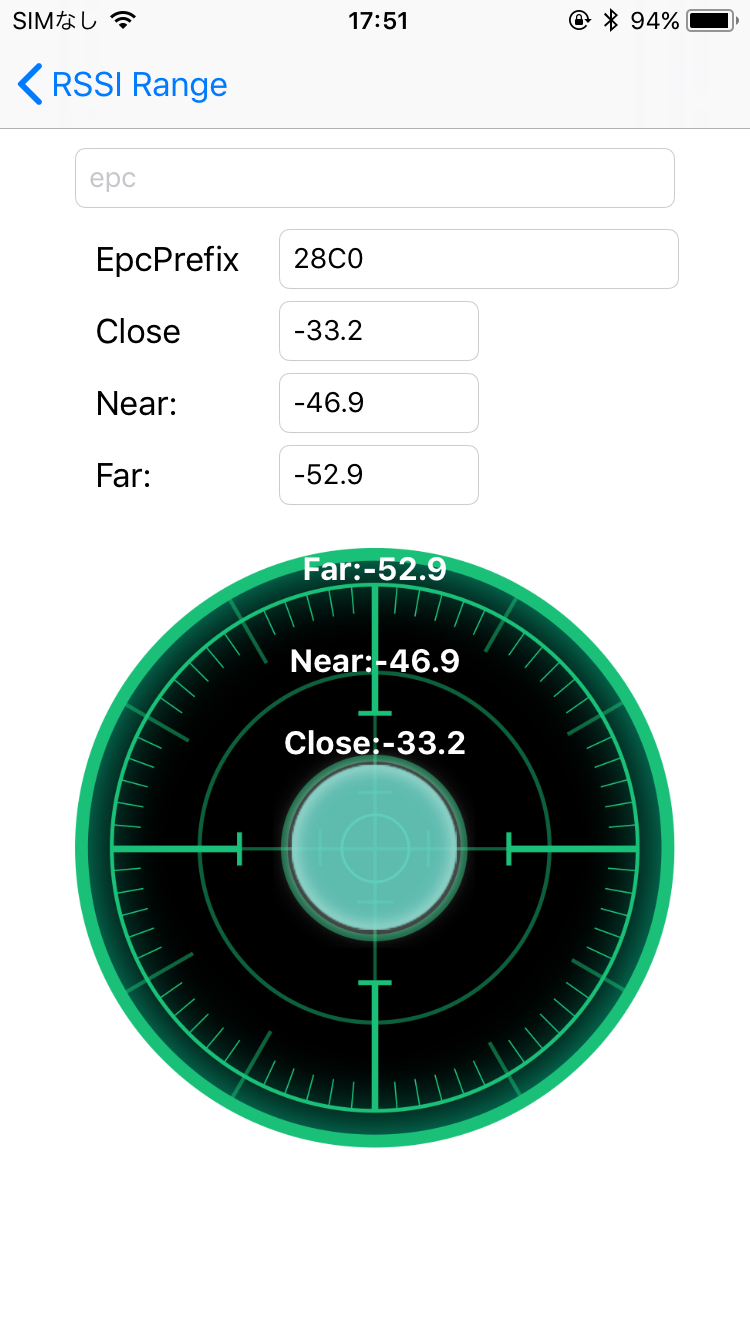
Rssi-range setup (How to determine Far, Near, Close in a search envrionment):
(1) Prepare a test tag.
(2) Touch up the EPC textField.
(3) Read EPC code of the test tag by pressing trigger.The 4 letters of the head of the EPC code will be filled into EpcPrefix textField.
(4) Touch up the textField Close, move to a close position to the test tag in you environment, then press the trigger, the RSSI value will be filled into textField Close.
you can also fill Near/Far textField at the middle position and the most far position by the same way.
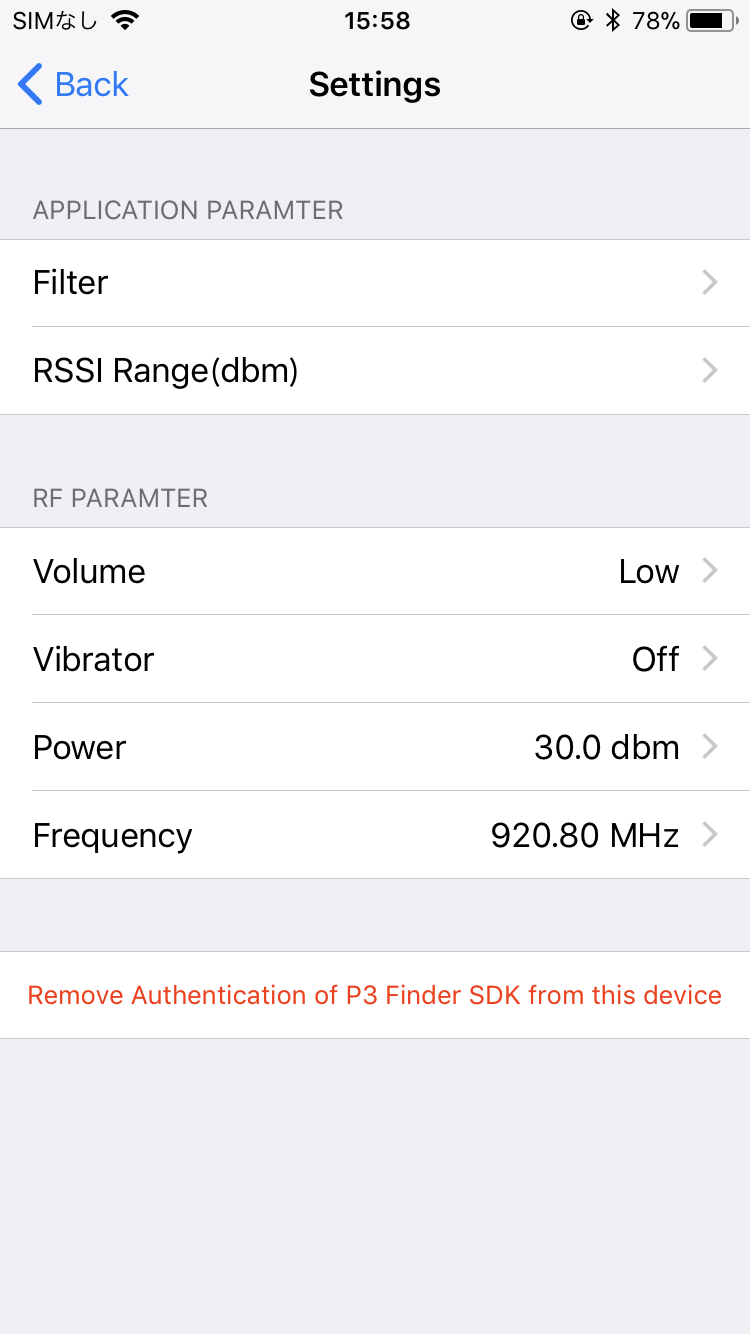
Settings
P3 Finder SDK offers the setting view controller to help you set RF parameters, Rssi-range and Remove Authentication of P3 Finder SDK. You can get it by the following:
  let sd = UIStoryboard(name: "P3Finder", bundle: Bundle(for:.self))
  let vc = sd.instantiateViewController(withIdentifier: P3SDK.SettingVC_ID)
  self.navigationController?.pushViewController(vc, animated: true)
Authentication
P3 Finder SDK will access the authentication server to verify license when your application starts for the first time. You can remove authentication on an iOS device to reduce number of device used on the authentication server by the following code:
P3SDK.removeAuthentication()
You also can remove authentication from the Settings display as shown in Section Settings.